HTML & CSS Week 4 - Filter Fun
Last week we introduced divs, and made a div for the header, and another for the content. Actually, we probably didn't make a div for the content, as we ran out of time. So your first job is to pop back to Week 3 and do that now...
Build up your content
Now that you've got your layout, let's add in some more content. Think about what you want your page to be, and think about how it fits in the space. Are your images too big? Are they too small? Should they be in the middle? on the right? Should the text go around them? Download a few more pics so you can play around
Once you've added more text and images, have a play around. Put an image inside your paragraph, or headings - how does it behave? And for thet matter, what happens if you put a paragraph inside a paragraph?
Block vs Inline
What you might notice is that images appear "in line"  with the text.
This is a property called 'display' and it can be changed using CSS. Block display means the element takes up the whole width
of the page, like the paragraph or heading tags. New content appears underneath. Inline means that it appears in the flow
of the other content, and the next element appears alongside it. We saw this with the span< tags previously.
Try changing the style of one of your images to display as block:
    img {
        display: block;
    }
to change all images, or give one image an id:
    #blockimage {
        display: block;
    }
    <img id='blockimage' src='myimage.png'>
There are other ways of affecting how things display, too. Instead of display: block, try 'floating' the
image to either the left or the right:
    img {
        float:right;
    }
A different class
We've seen how we can change the style of one particular element - an individual image, say - by giving it an id. But we can only have one
element with each ID. What if we want to change a bunch of them? What if you want to change some of your elements, but not all
of them? This is where class comes in. We set a class attribute on the things we want to change, and then we style that class. In the
stylesheet, we refer to a class by putting a full stop in front of it's name. Try adding a class to some of your paragraphs:
<p class='snot'>This is my snotty paragraph<p>
<style>
    .snot {
        color: #6B8E23;
    }
</style>
This is my snotty paragraph
Fancy filters
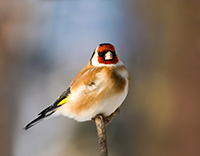
Finally, just for fun, we'll look at adding the filter property to our images. Filter is used to make an image change. Have a look here if you want to play with an interactive tool, which also gives you the CSS code you can copy to apply the filter to your image
img {
    filter: blur(4px);
}
img {
    filter: sepia(100%);
}
img {
    filter: hue-rotate(100deg) saturate(5);
}


img {
    filter: contrast(3);
}
img {
    filter: opacity(0.3);
}
img {
    filter: grayscale(1) contrast(10);
}


